
WWDC22: Get Started With WeatherKit
Daily Coding Tip 101

Celebrating WWDC 2022 and the 100th Daily Coding Tip 🥳
All tutorials will be free this week!

A lot of the complexity of getting WeatherKit up and running is getting the right capability in place. Go to create an App ID on Apple’s Developer website.
You will need to enable WeatherKit on BOTH of the tabs called Capabilities and App Services. Your bundle identifier will need to be explicit, and you will need to wait at least 30 minutes after creating your App ID before trying to use WeatherKit.

Now create a new app project in Xcode 14 beta, making sure to add the WeatherKit capability on the Signing and Capabilities tab of your project file, as seen below.
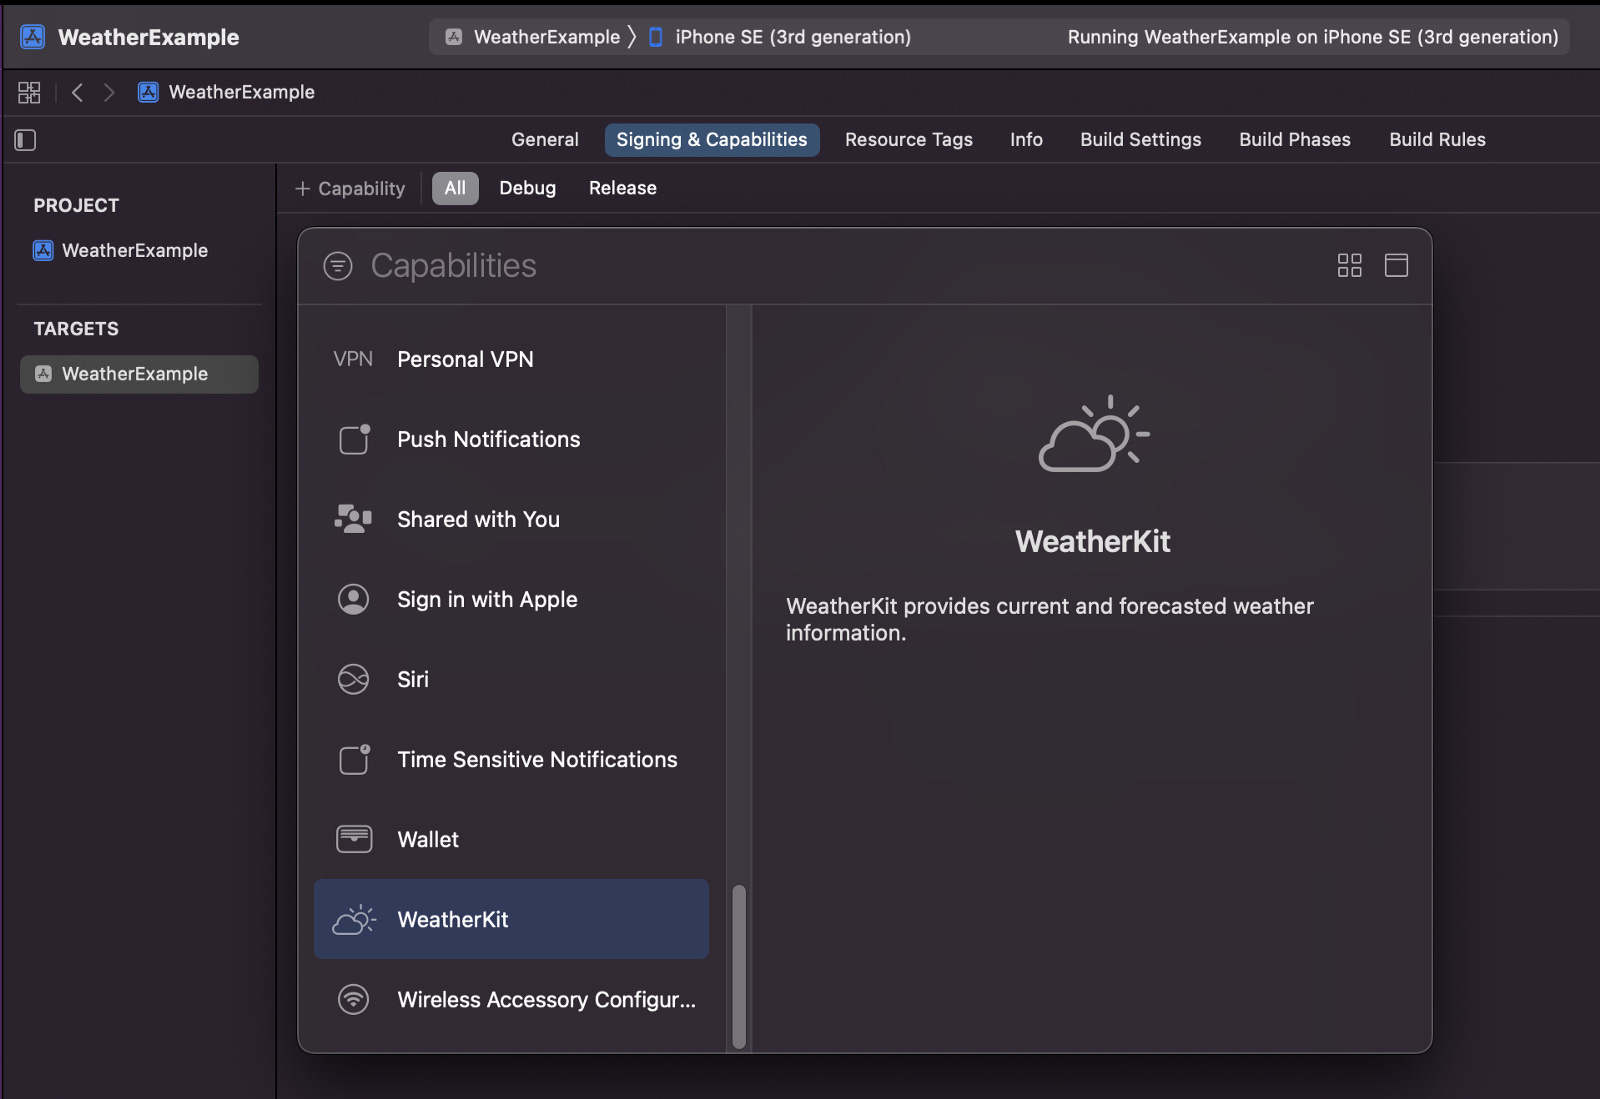
So hopefully you’ve created your App ID with the right capabilities and app services and waited half an hour, then you’ve created an app project with the same bundle ID as your App ID, and finally you’ve added that capability to your project file.
Now we can actually get to the fun part, which is making a SwiftUI interface that displays weather data.
To keep this simple I’m making an app that only displays the temperature in Cupertino at the current time:
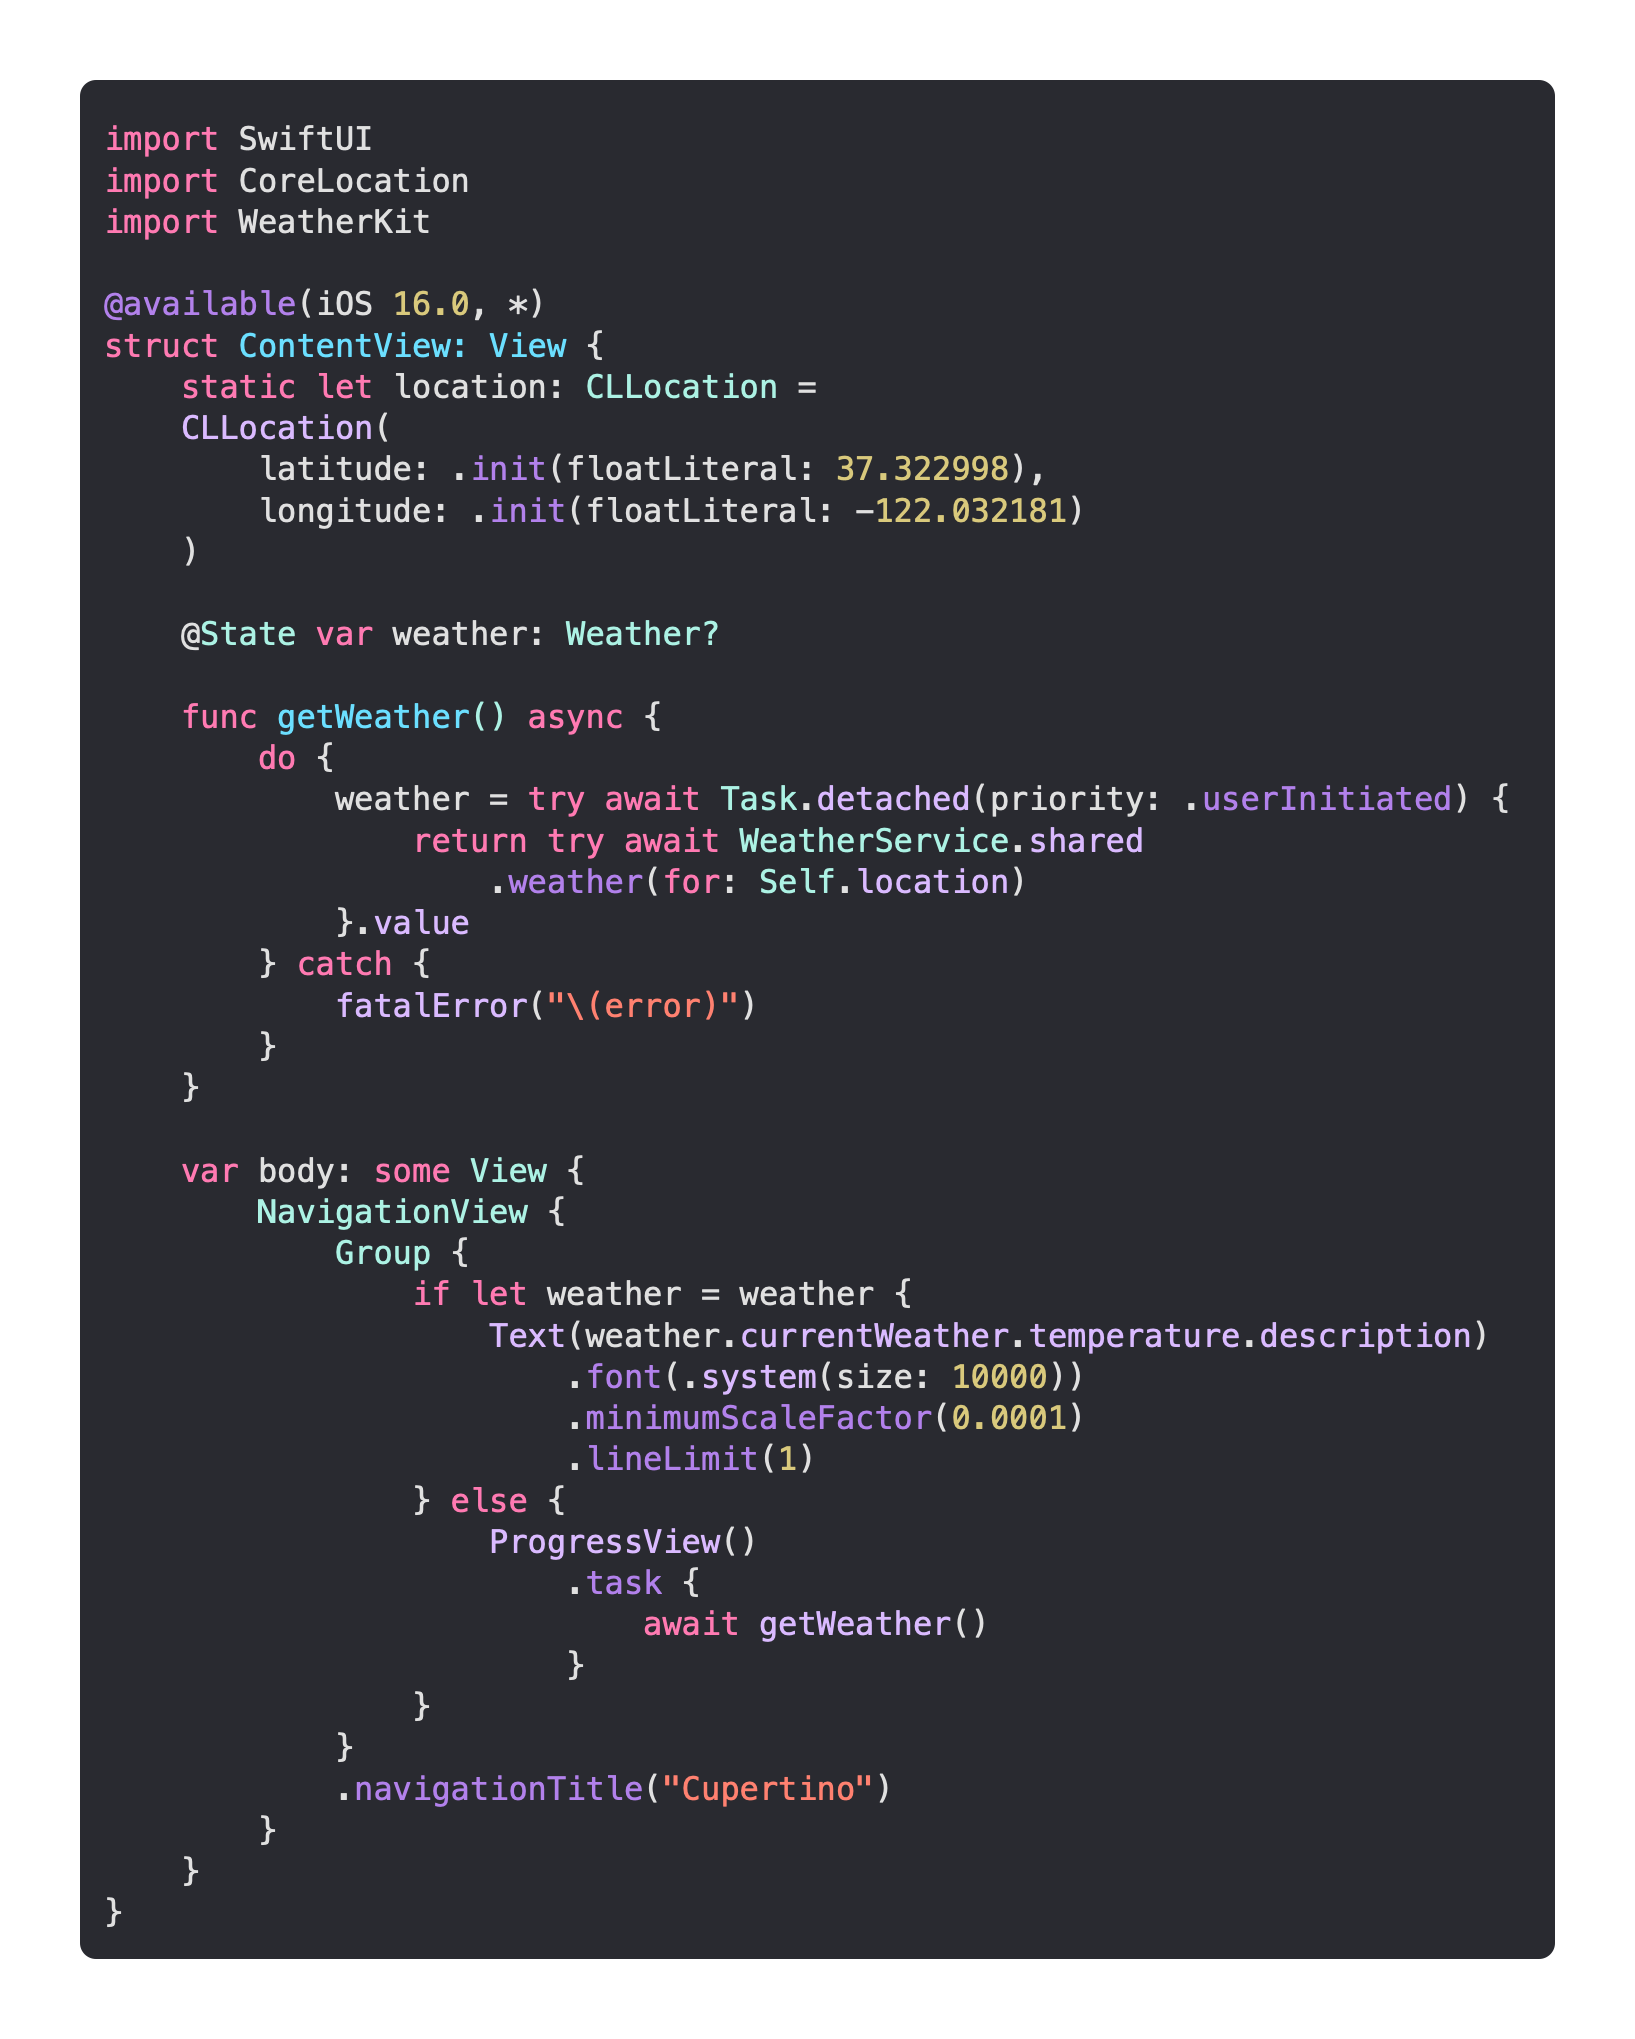
The latitude and longitude of Cuptertino were calculated using latlong.net and saved as a static CLLocation object.
In order to make the temperature big on the screen, a huge font size was selected with a minimum scale factor. This is how we access the 'auto-shrink' feature as it was known in UIKit. The line limit is used so that the units are not put onto a second line, which will happen if the string gets too long. When the weather object is nil there is a spinner in the form of a ProgressView, and the .task modifier is used in order to fetch the weather when the spinner first appears. Both this ProgressView and the Text that displays the temperature are inside a Group so that they can both have the same navigation title. This is displayed at the top of the screen, letting us know the location of the temperature we're displaying.
WeatherService has a shared singleton, and this is how we access the WeatherKit API. There is no need to add any sort of authentication, as this is done through the App ID's capabilities.
Passing the WeatherService a location gives us an object with a bunch of useful data, but we're only concerned with the current weather right now.
If you have not waited half an hour after creating your App ID, you may get a fatalError that says you got an invalid JWT response with a 401 error code.
If you still get this error after waiting half an hour, your App ID may not have been configured correctly (or Apple’s servers are just slow).
I did also experience errors that complained that parts of the weather object were missing.
You might be able to stop the app from crashing by changing the fatalError to printing the error, as they aren’t necessarily fatal errors.