
Recreate Finder From OS X Panther in SwiftUI (Part 1 of 2)
Daily Coding TIp 037

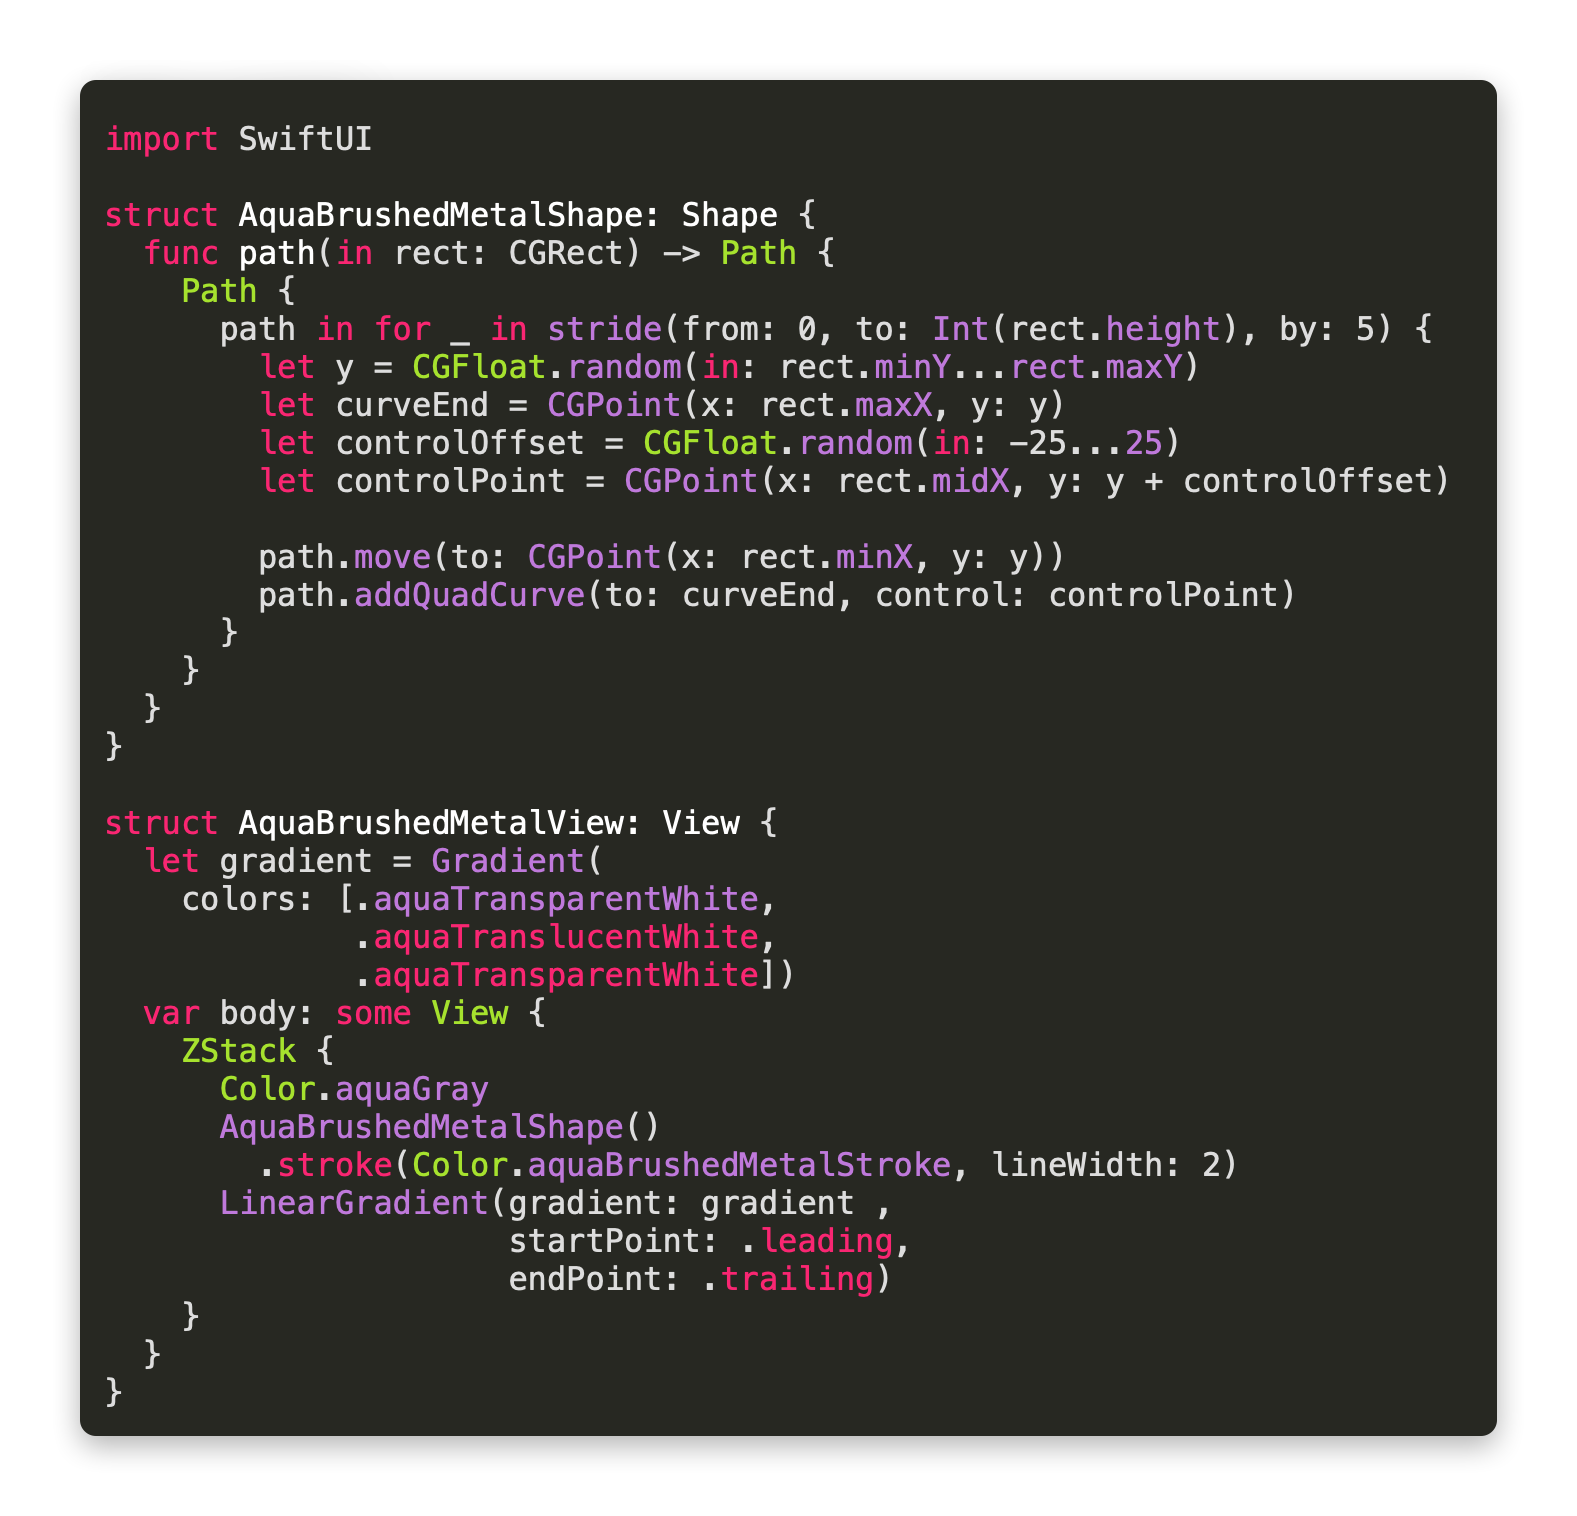
Today we’ll be recreating the brushed metal effect that used to be visible in the background of windows on Mac OS X Panther, as well as the iconic Aqua buttons at the top of the menu bar. I’ve achieved the brushed metal effect with three layers: a solid light grey colour, a path that draws horizontal lines, and a gradient that provides lighting.
Before we get started with that, we should set up some Color constants.
These are the only colours you’ll need for recreating the entire window.

First we’re creating a shape that contains the path for the horizontal lines. If you look carefully at the original brushed metal effect, you’ll see that the lines are not perfectly straight. Our lines are quadratic curves, meaning they have a control point that bends them up or downwards. In order to make the effect scale to any size, I decided to use a loop that divides the height of the window into steps of 5 points. If the window is 500 points tall, the loop will draw 100 lines. The vertical location of each curve, as well as the control point that bends it, is still calculated at random.
If the lines weren’t drawn at random, it would seem too much like a stripe pattern.
Next we need to make the kind of circular button that we will use for the close, minimise and full screen buttons in the top left of the window. We’re starting by making a simple View that create an outline of any shape with a gradient on it. This is useful for adding a highlight at the top and a shadow at the bottom, which is common in the OS X Aqua design. We use this for the circular button, but also the outline of the window itself. At the back of the ZStack we have a highlight, which takes the form of a very light grey circle that is offset to the left.
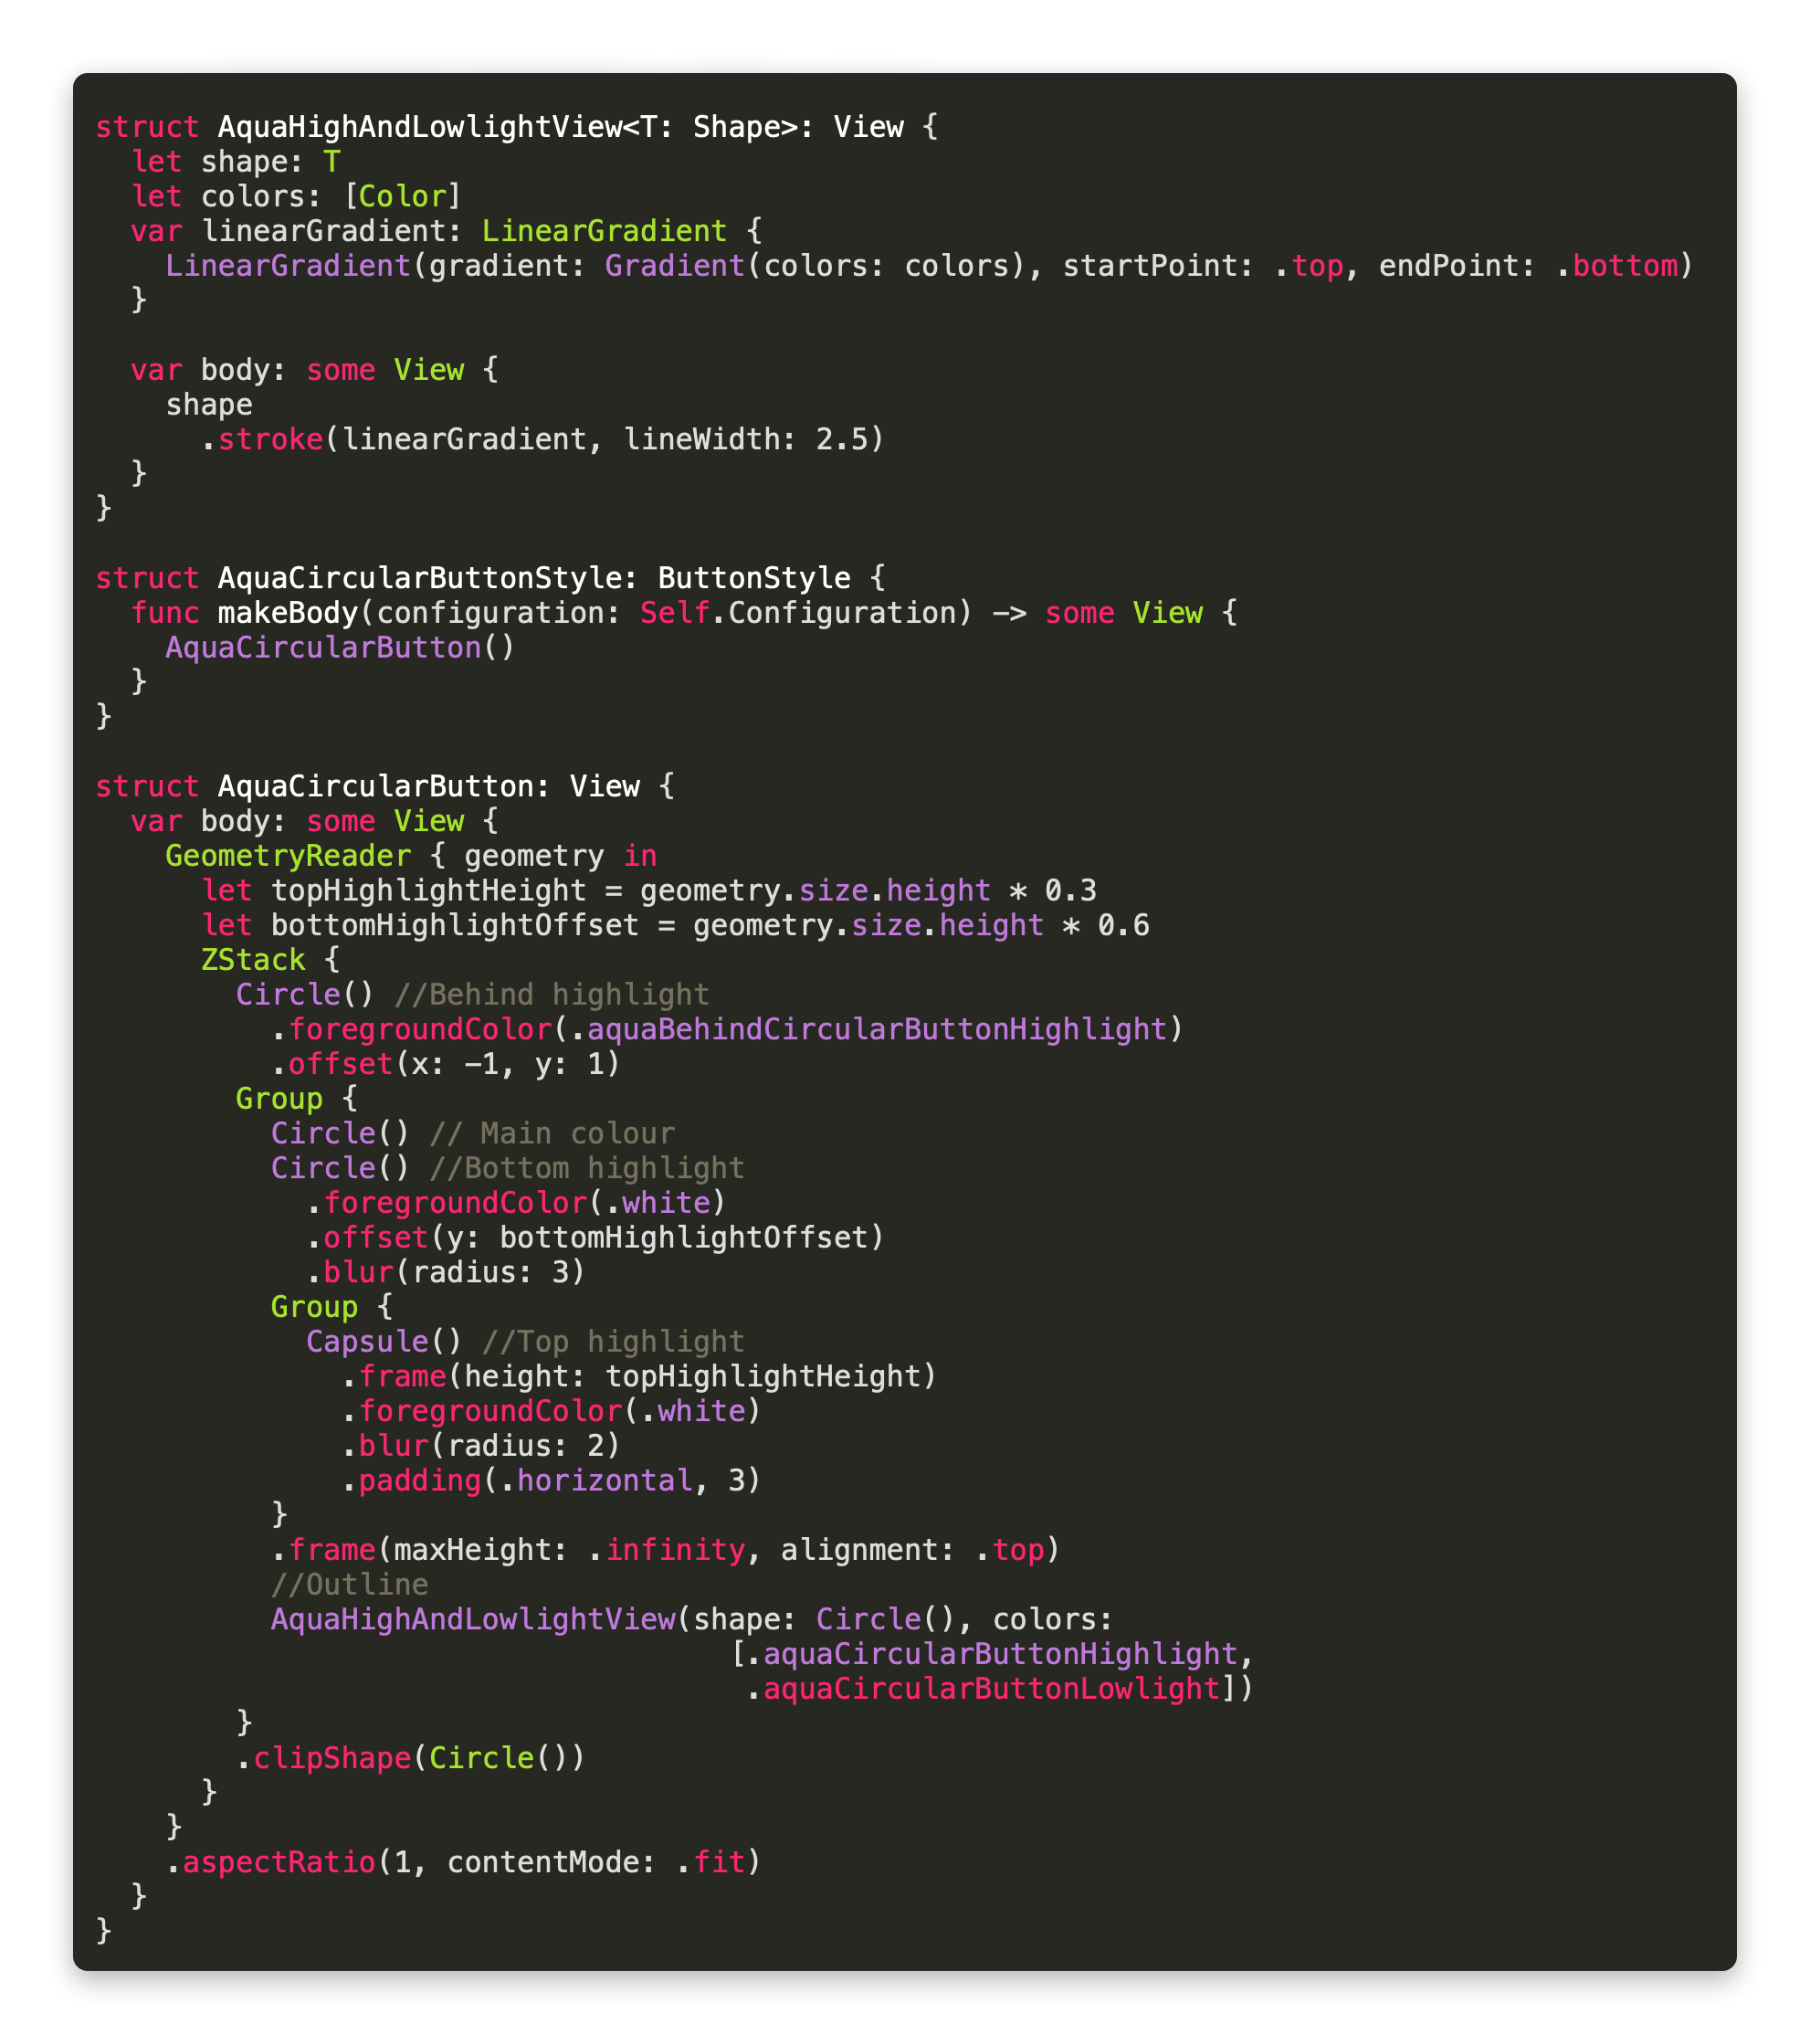
In front of this we have a circle without a specified foregroundColor, which is important because this will take on the colour that we want our button to be. The lower half of the circle has a highlight on it, which is achieved by blurring a white circle and moving it down. I’ve used a GeometryReader to calculate how much offset should be applied, as well as to determine the size of the top highlight. Finally we add the outline, before entire button is clipped to the shape of a circle, and the aspect ratio is set to square.
That’s all for part 1, but part 2 is now available!